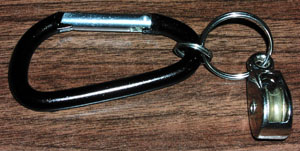
The pulleys can now be assembled. Take one of the 1-1/8" split key rings and thread it onto the eye in the pulley. Take one of the 3/4" split key rings and thread that onto the 1-1/8" split key ring. Take one of the 3" aluminum caribiners, open the gate and slip the 3/4" split key ring onto the caribiner. The final result can be seen in Fig. 10 below.
Repeat Step 14 above for the other pulley assembly.
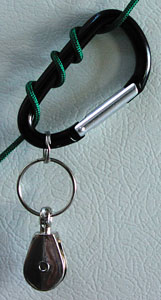
When you get out on the field you can attach the caribiners to the main flying line by simply opening the gate and wrapping the line 3-4 times around the caribiner. This will hold very well and is a standard method for attaching line laundry without damaging the flying line. See Fig. 11 below to see how this looks in practice.
Space the two caribiners approximately six feet apart on the flying line so that the lifting line does not get tangled on the para bear. You will have to gauge how far along the flying line you attach the caribiners depending on the flying angle of the lifter kite, wind conditions, space available etc. You should however leave at least fifty feet between the lifter kite and the highest caribiner.
Take the line you are going to use for lifting and make sure there are no knots in the end. Thread the end of the line through the lower pulley first ensuring that the line travels from the lowest side towards the kite then thread it through the higher pulley. Once it is threaded through both pulleys tie a Figure 8 knot in the end of the line.
Note: The length of this line must be more than double the expected drop height.
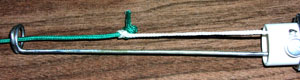
Thread the knotted end of the lifter line through the ring in the wire coming out of the PVC tube (be sure to put it through the ring in the correct direction). Tie a Lark's Head knot in the loop of line on the upper end of the PVC tube and put this over the knotted end of the lifter line and pull tight. See Fig. 12 below.
This next part can get tricky and usually requires a couple of helpers depending on the kite used and wind conditions. You have to be able to launch the kite and very quickly let out the lifter line as the kite rises. I am going to assume that you launch your kites by running out the required length of line, securely anchor it and then attach the kite to the end (this is the preferred method of launching large kites).
If your lifter line is much weaker than the main flying line you do not want to be left holding the full power of the kite on the thinner line! There are a couple of ways of getting around this problem.
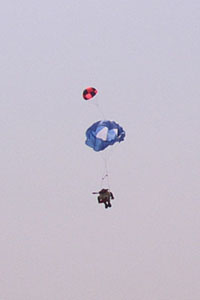
Once you have your options sorted it is time to launch your lifter kite. Hopefully things will go smoothly and your kite will rise majestically into the sky as your lifter line pays out. If the dropper should end up somewhere between the upper caribiner and the ground simply pay out more line until it is back on the ground.
With your lifter kite now flying gracefully in the sky it is time to attach the first para bear to the dropper.
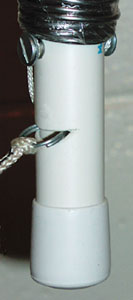
If you are using a para bear with a back pack and ripcord both the bear and ripcord will now have to be attached to the dropper. Start off by attaching the bear to the dropper. Push the ring on the end of the wire towards the PVC tube and the lower end of the wire will clear the slot in the bottom of the tube. Insert the ring on the para bear into the slot in the tube and release the pressure on the wire. Your bear is now safely loaded. See Fig. 13 below.
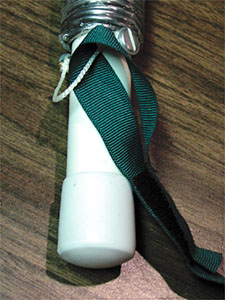
If you use a ripcord like mine you will have a 'hook and loop' fastener on the end. Open the fastener and pass it around the loop of 50# Dacron on the lower book screw and stick it back to itself. See Fig. 14 below.
If you use a different method of attaching your ripcord then you will have to and find some way of attaching it to the dropper.
If you use just a parachute and no back pack/ripcord then you will need either a loop or ring sewn to the top of the canopy. Place this loop/ring into the slot in the tube as described above.
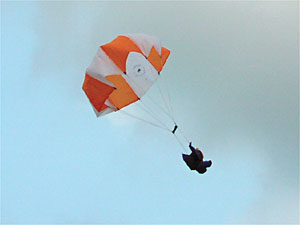
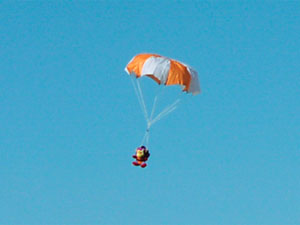
Once your bear is secure you can begin to haul him skyward by pulling steadily on the lifter line coming from the lower caribiner/pulley. When the dropper reaches the upper caribiner the ring on the wire will hit the bottom of the pulley. As you continue to gently pull on the lifter line the PVC tube will rise on the wire thereby releasing the bear to hopefully deploy his chute and glide gently back to earth. Once the bear is clear you can lower the dropper to the ground ready for the next bear. DO NOT let the dropper plummet freely to earth as it could be extremely dangerous to any one in the vicinity if it should hit them during its descent. You also run the risk of breaking the dropper itself.
Hopefully your pulley dropper system works as it should and I wish you as much pleasure with your para bears as we get from ours.